In today's digital age, securing your devices behind a firewall is crucial for protecting sensitive data. A Raspberry Pi monitor behind a firewall offers a robust solution for network monitoring and security. Whether you're a tech enthusiast or a professional IT administrator, understanding how to set up a Raspberry Pi in such an environment can significantly enhance your network's safety.
Raspberry Pi has become a popular choice for various tech projects due to its affordability and versatility. By configuring it as a network monitoring tool behind a firewall, you can ensure that your data remains secure while still allowing you to monitor and manage your network effectively.
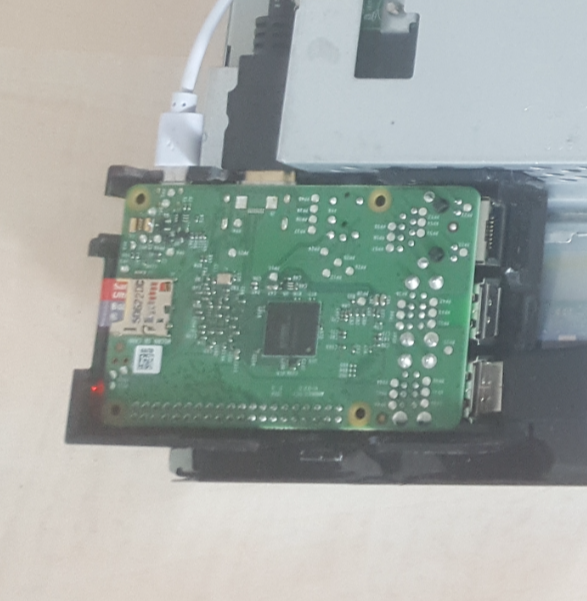
In this comprehensive guide, we will walk you through the process of setting up a Raspberry Pi monitor behind a firewall. From the necessary hardware and software requirements to advanced configurations, we'll cover everything you need to know to create a secure and efficient monitoring system.
Read also:Stray Kids The Rise Of A Global Phenomenon In Kpop
Table of Contents
- Introduction to Raspberry Pi and Firewalls
- Hardware Requirements for Raspberry Pi Monitoring
- Software Setup for Raspberry Pi Monitoring
- Understanding Firewalls and Their Role
- Step-by-Step Installation Process
- Configuring Raspberry Pi Behind a Firewall
- Top Tools for Network Monitoring
- Enhancing Security Measures
- Troubleshooting Common Issues
- Conclusion and Next Steps
Introduction to Raspberry Pi and Firewalls
Raspberry Pi has gained immense popularity due to its compact size and powerful capabilities. It serves as an ideal platform for various applications, including network monitoring. A firewall, on the other hand, acts as a protective barrier between your internal network and external threats.
By integrating Raspberry Pi with a firewall, you can create a robust system for monitoring and securing your network. This setup allows you to control incoming and outgoing traffic, ensuring that only authorized data passes through.
In this section, we will explore the basics of Raspberry Pi and firewalls, laying the groundwork for a more detailed discussion on their integration.
Hardware Requirements for Raspberry Pi Monitoring
Before diving into the software setup, it's essential to ensure that you have the right hardware components. Here's a list of the necessary items:
- Raspberry Pi (any model with sufficient processing power)
- MicroSD card (preferably 16GB or more)
- Power supply compatible with your Raspberry Pi model
- Ethernet cable or Wi-Fi adapter for network connectivity
- HDMI monitor and keyboard (optional, for initial setup)
Having the correct hardware ensures that your Raspberry Pi runs smoothly and efficiently, enabling it to handle monitoring tasks without any issues.
Choosing the Right Raspberry Pi Model
When selecting a Raspberry Pi model for network monitoring, consider the following factors:
Read also:Skysetx The Ultimate Guide To Understanding Its Impact And Potential
- Processing power: Opt for models with higher clock speeds for better performance.
- RAM: More RAM allows for smoother multitasking and handling of larger datasets.
- Connectivity options: Ensure that the model you choose supports the required network interfaces.
Software Setup for Raspberry Pi Monitoring
Once you have the hardware ready, it's time to set up the software. The Raspberry Pi OS is the most commonly used operating system for Raspberry Pi devices. Here's a step-by-step guide to installing and configuring the OS:
1. Download the Raspberry Pi Imager from the official website.
2. Insert your MicroSD card into your computer and launch the Raspberry Pi Imager.
3. Select the Raspberry Pi OS from the list of available options and choose your MicroSD card as the target device.
4. Click on "Write" to begin the installation process.
5. Once the installation is complete, insert the MicroSD card into your Raspberry Pi and power it on.
Installing Monitoring Software
To monitor your network, you can install various software tools. Some popular options include:
- Wireshark: A network protocol analyzer for capturing and analyzing network traffic.
- Pi-hole: A DNS-based ad blocker that can also be used for network monitoring.
- Zabbix: A comprehensive monitoring solution for IT infrastructure.
Understanding Firewalls and Their Role
A firewall is a critical component of any secure network infrastructure. It acts as a gatekeeper, controlling the flow of data in and out of your network. By setting up a Raspberry Pi behind a firewall, you can ensure that your monitoring activities remain secure and protected from external threats.
Firewalls can be either hardware-based or software-based. For Raspberry Pi monitoring, a software-based firewall like iptables is often sufficient. This tool allows you to define custom rules for managing network traffic, ensuring that only authorized data is allowed to pass through.
Configuring a Software-Based Firewall
To configure a software-based firewall on your Raspberry Pi, follow these steps:
1. Update your Raspberry Pi OS by running the following commands:
sudo apt update
sudo apt upgrade
2. Install iptables by running:
sudo apt install iptables
3. Create custom rules for managing incoming and outgoing traffic.
Step-by-Step Installation Process
Now that you have a basic understanding of the hardware and software requirements, let's dive into the installation process. Here's a detailed guide to setting up your Raspberry Pi monitor behind a firewall:
1. Connect your Raspberry Pi to your network using an Ethernet cable or Wi-Fi adapter.
2. Power on your Raspberry Pi and log in using the default credentials.
3. Update the operating system and install any necessary software packages.
4. Configure your firewall settings to allow only authorized traffic.
5. Install and configure your chosen monitoring software.
Testing the Setup
After completing the installation process, it's crucial to test your setup to ensure that everything is functioning correctly. This includes verifying that:
- Your Raspberry Pi is connected to the network.
- The firewall is correctly configured and blocking unauthorized traffic.
- The monitoring software is capturing and displaying data accurately.
Configuring Raspberry Pi Behind a Firewall
Configuring your Raspberry Pi to operate behind a firewall involves several key steps. These include setting up port forwarding, defining custom firewall rules, and ensuring secure communication between devices.
Port forwarding allows you to direct specific types of traffic to your Raspberry Pi while keeping other traffic blocked by the firewall. This is particularly useful for services like SSH, which require external access for remote management.
Setting Up Port Forwarding
To set up port forwarding on your router, follow these steps:
1. Log in to your router's admin interface using a web browser.
2. Navigate to the port forwarding section and create a new rule.
3. Specify the internal IP address of your Raspberry Pi and the desired port number.
4. Save the changes and test the connection to ensure that port forwarding is working correctly.
Top Tools for Network Monitoring
There are several tools available for network monitoring, each with its own strengths and weaknesses. Here are some of the top options:
- Wireshark: Ideal for capturing and analyzing network traffic in real-time.
- Pi-hole: Perfect for blocking unwanted ads and tracking scripts on your network.
- Zabbix: Offers a comprehensive monitoring solution for IT infrastructure, including network devices and servers.
Choosing the right tool depends on your specific needs and the complexity of your network environment.
Comparing Monitoring Tools
When evaluating different monitoring tools, consider the following factors:
- Feature set: Does the tool offer the features you need for your monitoring tasks?
- Ease of use: Is the tool user-friendly and easy to configure?
- Scalability: Can the tool handle the size and complexity of your network as it grows?
Enhancing Security Measures
Security should always be a top priority when setting up a Raspberry Pi monitor behind a firewall. Here are some tips for enhancing the security of your setup:
- Use strong passwords and enable two-factor authentication for remote access.
- Regularly update your operating system and software packages to patch any security vulnerabilities.
- Limit access to your Raspberry Pi by restricting SSH access to specific IP addresses.
By following these best practices, you can ensure that your network remains secure and protected from potential threats.
Regular Security Audits
Performing regular security audits is essential for maintaining the integrity of your network. This involves:
- Reviewing firewall logs for suspicious activity.
- Testing your network for vulnerabilities using tools like Nessus or OpenVAS.
- Updating your security policies and procedures as needed.
Troubleshooting Common Issues
Even with careful planning and execution, issues can arise during the setup and operation of your Raspberry Pi monitor behind a firewall. Here are some common problems and their solutions:
- Connection issues: Ensure that your Raspberry Pi is properly connected to the network and that the firewall is configured correctly.
- Software conflicts: Check for any conflicts between installed software packages and resolve them by updating or reinstalling the affected programs.
- Performance problems: Optimize your Raspberry Pi's settings and allocate sufficient resources to handle monitoring tasks efficiently.
By addressing these issues promptly, you can minimize downtime and ensure that your monitoring system operates smoothly.
Conclusion and Next Steps
Setting up a Raspberry Pi monitor behind a firewall is a powerful way to enhance the security and efficiency of your network. By following the steps outlined in this guide, you can create a robust monitoring system that meets your specific needs.
We encourage you to share your thoughts and experiences in the comments section below. Additionally, feel free to explore other articles on our site for more tips and tricks on optimizing your Raspberry Pi setup.
Remember, security is an ongoing process. Stay informed about the latest developments in network security and continuously improve your monitoring system to stay ahead of potential threats.